How to Properly Heat a Steel Branding Iron
Share
Steel Branding Iron Heating
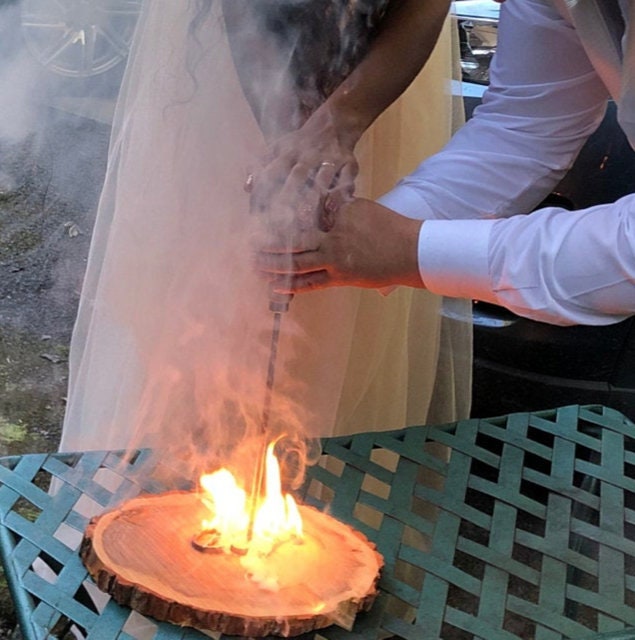
Branding irons have been around for centuries, and while their purpose has evolved from marking cattle to customizing wood, leather, and even food, one thing remains constant: the need for proper heating. Whether you’re branding a steak, a piece of wood, or creating a custom mark for a wedding, knowing how to heat a steel branding iron correctly ensures a clean, crisp brand every time.
In this guide, we’ll walk through the steps for heating a steel branding iron safely and effectively, so you can make sure your marks turn out perfect.
Tools You'll Need
- Steel branding iron
- Heat source (propane torch, gas stove, or open flame)
- Heat-resistant gloves
- Timer (optional but recommended)
- Protective surface for branding
Step-by-Step Guide to Heating Your Steel Branding Iron
1. Choose Your Heat Source
There are several ways to heat a branding iron, but the most common and effective methods are:
- Propane Torch: The propane torch is ideal for quick, direct heat and allows for controlled heating. It’s portable and heats the branding iron evenly.
- Gas Stove: A gas stove offers even heating and works well if you're indoors and need a stable, consistent flame.
- Open Flame: If you’re outdoors, an open flame like a campfire or charcoal grill works, but make sure the heat is evenly distributed.
Each of these methods is effective, but some are better suited for specific branding surfaces. For instance, a propane torch is great for quick, small brands on food, while an open flame may be more appropriate for wood or leather.
2. Preheat the Iron
Position the branding iron about 2 to 3 inches above the flame or heat source. If you’re using a propane torch, hold the torch a few inches away from the branding iron and move it in slow, circular motions to heat it evenly.
Heating Time: For smaller branding irons used for food or leather, about 2 to 3 minutes of heating should suffice. Larger irons, particularly those used for wood or wedding décor, might take 5 to 10 minutes to reach the right temperature.
3. Check the Temperature
Getting the branding iron to the right temperature is crucial for a successful brand. If the iron is too hot, it can burn and ruin your material. If it’s too cold, the brand will be faint or incomplete.
- Test the Heat: To check if the branding iron is hot enough, you can do a quick test by branding a scrap piece of the material you're working with (wood, leather, or even a test piece of food like bread). Look for a clean, clear mark without scorching.
- Color of the Iron: A properly heated branding iron should glow a light red, indicating it’s hot enough. If the iron is dark or black, it's not ready. If it's bright red, it might be too hot for more delicate surfaces like food or soft leather.
4. Handle with Care
Once the iron reaches the desired temperature, use heat-resistant gloves to handle it. Always keep the iron away from flammable objects and surfaces. If you’re branding food, make sure you work on a heat-safe surface like a cutting board or grill.
5. Time to Brand
With your heated branding iron ready, press it firmly and evenly into the material. Hold it in place for 2 to 5 seconds, depending on the material you're branding. For food, a shorter press will prevent burning; for wood or leather, you can hold it slightly longer to ensure a deep mark.
Tips for Branding Different Materials:
- Wood: Hold the branding iron longer for a deeper impression, but avoid overheating to prevent charring.
- Leather: Use medium heat to avoid burning, and press gently for a clean mark.
- Food: Keep the iron at a lower temperature and press for just a couple of seconds to avoid overcooking or burning.
6. Cool the Branding Iron
After branding, it's important to safely cool your branding iron. Set it on a non-flammable surface (such as a metal tray or a heat-resistant block) to allow it to cool down naturally. Never submerge the hot branding iron in water, as it can warp the metal and damage the iron.
Final Thoughts
Heating a steel branding iron may seem straightforward, but there’s a bit of an art to getting the perfect brand. The key lies in choosing the right heat source, ensuring even heating, and taking care not to overheat. With practice, you'll be able to create beautiful, clean brands on wood, leather, food, or other materials.
Branding irons offer endless possibilities for customization, whether you’re preparing for a rustic wedding or adding a personal touch to your cooking. By following these steps, you’ll be well on your way to mastering the craft!
Happy branding!